To watch the sunrise on Santorini you have to be in the right place. And at the right time of course.
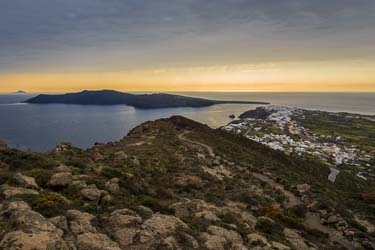
Where to watch the sunrise on Santorini? Simple. On the eastern edge of the caldera. Stay on the west and you will be waiting a while for the sun to rise over the land!
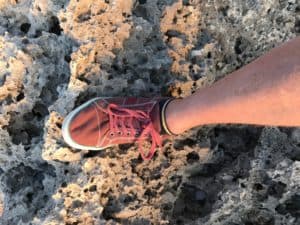
And no I did not drive to this location, I got there after photographing the sunrise on my own two feet wearing my ridiculously packed red pumps.
Have I shown you my red pumps yet?
Here they are. Well one of them anyway. You get the idea. Stupid footwear choice for a photography trip I know. Red Moshulu pumps.
Why do I like this photo so much?
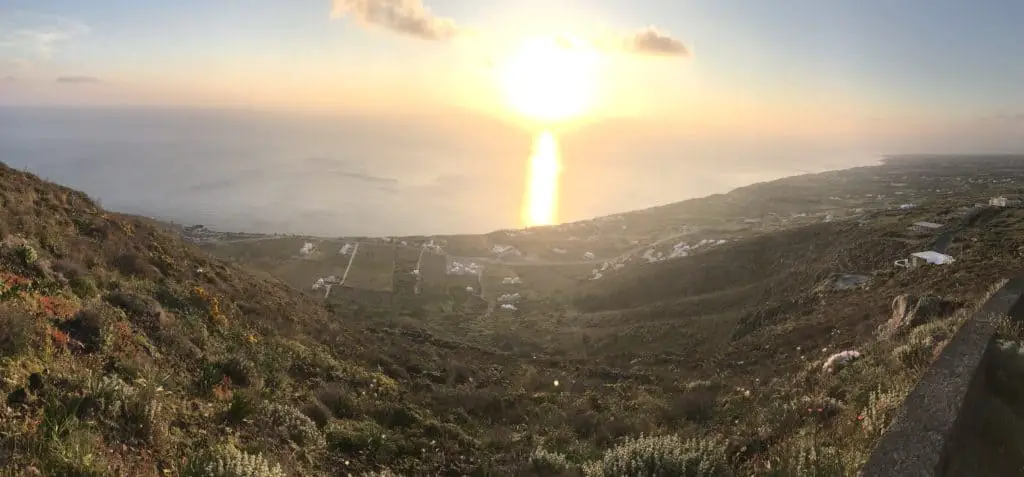
This is another less popular view of the sunrise on Santorini. This photo was taken from the side of the road from Imerovigli to Oia.
You can see the road in this picture.
More of that later. Sorry – I do digress from time to time. Back to why I like this picture of the sunrise on Santorini.
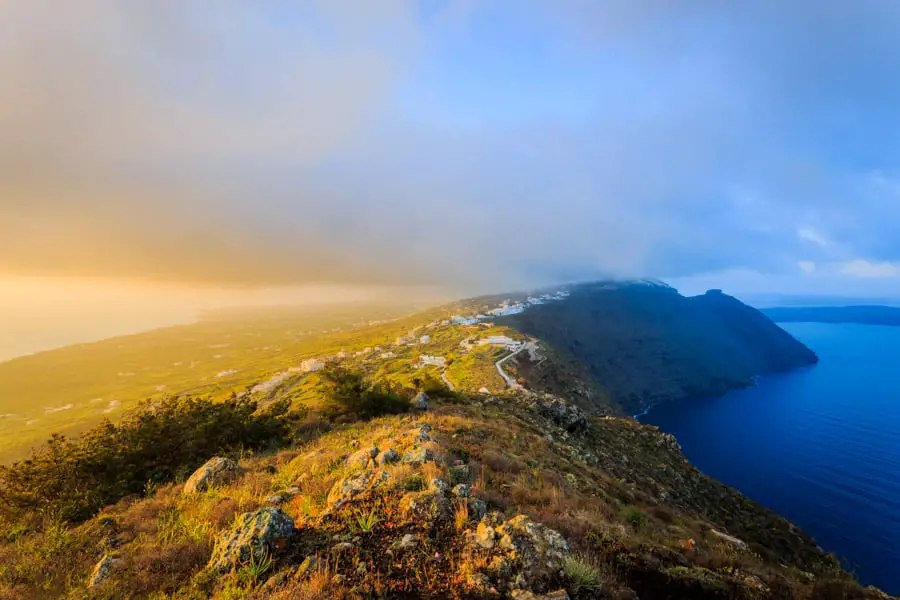
It is the view down the island, on the flatter eastern side, with those three stunning natural colours, green, blue and orange.
This was not in my original pick of 20 photos of Santorini, but after a rethink I edited this image and here it is.
And I am delighted to have added this landscape photo of Santorini to this website. Funny I have not used the term landscape photo on this website up until now!
How did I decide on this composition?
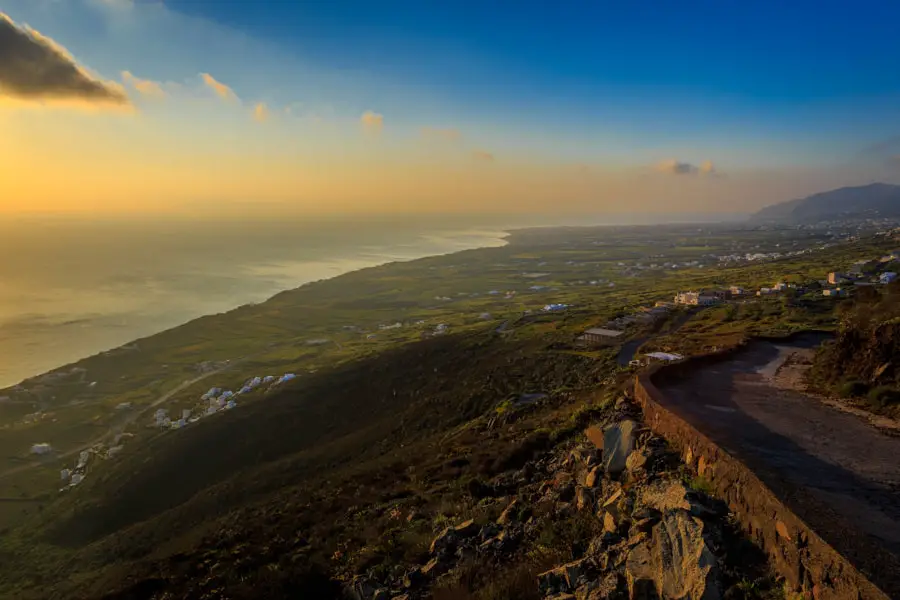
You can see the panoramic view in the next section of the whole scene. The composition was framed by the road to the right, and the cloud top left which I now wish was not there.
I excluded the sun from this composition as I wanted to the lovely sunrise colours to be the star of the show, without the (normally welcome) distraction of a big burst of bright sunshine.
This composition is all about the layers of colours, starting with the lovely blue sky, the the band of orange from the sun that has just risen and the lush green of the fields of the eastern coast of Santorini.
That was the story of this image. And as I have said not a view that I have seen before.
Where was the photo taken?
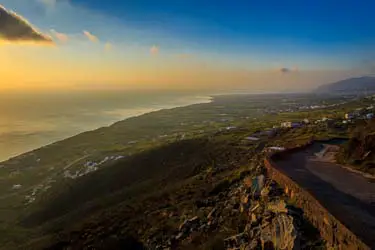
Well this is the view taken from the road with my iPhone. I love the ease with which the iPhone takes panoramic images, I just wish my main camera did the same as easily.
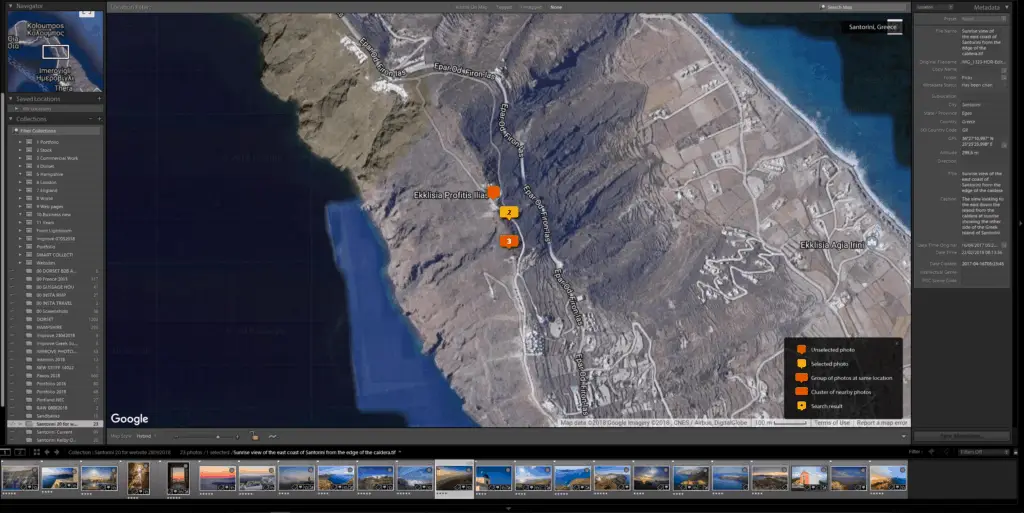
And this is the location recorded by the GPS on my Canon 6D. It is the yellow tab on the map.
What time of day was the photo taken?
5.23am. Just after the sun had risen. I had captured the stunning sunrise that I had walked all the way to this location for, and sat on the wall thinking about where to go next. And as I sat there and looked at the view that was when I realised I didn’t need to move – I was already at the next photo location. Well I had to move off the road and down a bit.
What photography gear did I use to get the shot?
- Canon 6D
- Canon 24-105mm F4 L Lens (focal length used 24mm)
- Manfrotto 190 Go tripod with geared head
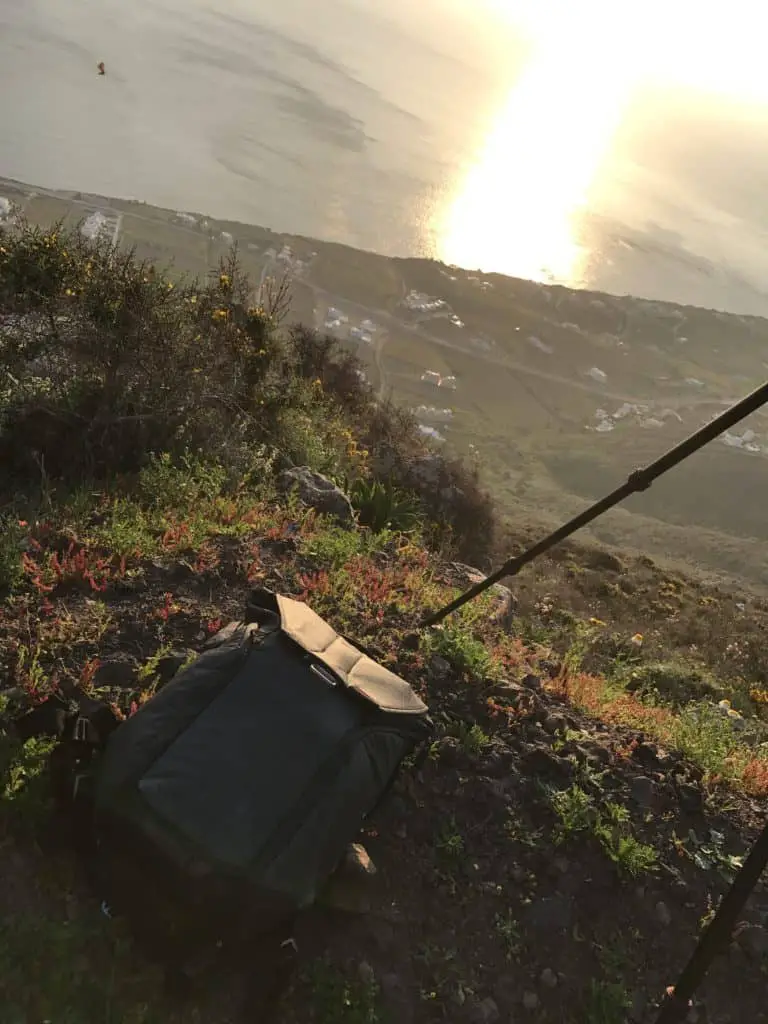
- Peak Design Everyday Backpack – here it is sat on that volcanic ground.
- Loupe Viewer
- My thick red hat
- Oakley sunglasses
- Pepsi Max – although coffee would have been much better
- Red shoes with thin socks (feet warming up by now)
I know that I was moving from one place to another as I used my 24-105mm lens. When I am settled in a location I tend to put my 17-40mm lens on my Canon 6D, as this will give me a wider view with some latitude going to 40mm.
I tend to shoot images using my 17-40mm lens at 17mm, and photos taken using my 24-105mm lens at 24mm, which I find quite interesting.
And I dont crop images, normally with my photographs what you see is what I saw and captured.
What camera settings did I use?
- Aperture F16
- Shutter speeds 1/40th second, 1/10th second and 1/160th second.
- ISO 100
- Back-button focus
- AV Mode
- 10 second self-timer
- RAW format
As usual I used the aperture I use other than F8 to get this shot – F16 – to get as much depth of field as possible. Did that make sense?
What I meant was that I use F8 unless I need more depth of field and then I use F16.
That was better second time around. Actual English.
One interesting fact about the image.
I have never seen this view before. Never. I guess people are only in this location of they are going somewhere else. It is just me who finds these obscure places and stops at them waiting for the sun to rise.
Is there a behind the scenes video of this shoot?
No – all I have is this still image taken on my iPhone showing my Canon 6D on my Manfrotto tripod.

Look at the contrast between a straight photo taken on my iPhone 7 Plus (which has a pretty good camera I have to say) and the final image taken on my Canon 6D and processed in Lightroom and Photoshop.
How did I process the image?
Here are the Lightroom settings showing most of what I did to the file created by merging together the three bracketed shots.
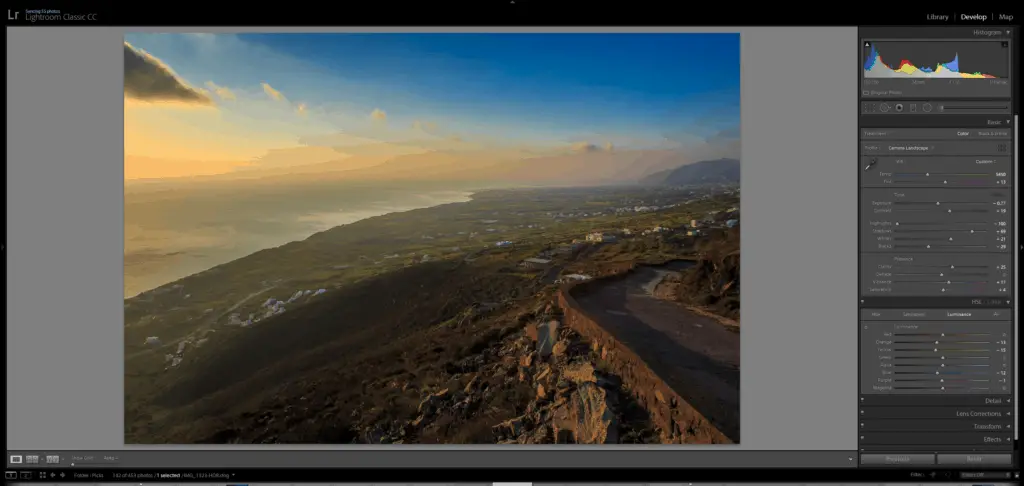
Nothing significant to report on the processing other than the fact that I used the HSL panels luminance and saturation tools to naturally enhance those lovely sunrise colours.
What could I have done to improve the image?
Well looking at this image the cloud top left bothers me to be honest. Now that I have said that you are looking at it aren’t you?
And before I said anything you hadn’t noticed had you?
The problem is the cloud was there, which is why I included it in the image. Tell you what – I will remove the cloud and see which looks better.
And what are my thoughts on this image?
This was not an original choice, but I am delighted to have changed my mind and included this image on my website.
I like this photo – it is all about those layers of colours, the lovely blue, orange and green complimented by the composition with the road on one side and the coastline on the other forming natural (ish) frames to the scene in the middle.
Talking of thoughts of this image, a comment I made earlier made me think (this happens from time to time). The complete contrast in colours, exposure and tonal range from the Canon 6D shot to the iPhone shot is quite startling.
And that thought is?
I should take the exact same scene on my iPhone as well as on my Canon 6D and do a comparison.
RAW image to RAW image and edited image to edited image.
It will be fascinating to see how the two compare. But that is one for another time.
Enough of me – what do you think of this image?
And have you ever seen a photo of this view before? I haven’t.
And a second specific question – do you prefer the photo of the sunrise on Santorini with or without the cloud?
Please let me know, and also what you think of this photo and if you have any comments or questions on this post.
One last thing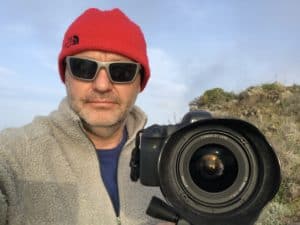
If you want to buy this image, or want to speak to me about future collaboration email me at sales@rickmcevoyphotography.co.uk.
Rick McEvoy ABIPP – Photographer, writer, blogger
Rick McEvoy ABIPP – Photographer, writer, blogger